Linking your Trello Board
To continue, you’ll need the following permission: Workspace Admin
1. Connect your Trello account to your Hyra workspace
First, connect your Trello account to your workspace. Please do note that you’ll only need one Trello account to link your whole workspace.
Select the board that you want to link
Once you’ve connected your Trello account, you’ll then need to select the board to link it to your workspace.
Check if the card is matched to your staff.
Once the cards have been processed, the system will show if they’ve found a match. If they matched the same person, click the button below.

Creating an Action
Once you’ve linked your Trello board to your Hyra workspace, it’s now time to create an action. These will instruct the system on what to do once a comment has been made to a card.To continue, you’ll need the following permission: Workspace Admin
Configure the action trigger
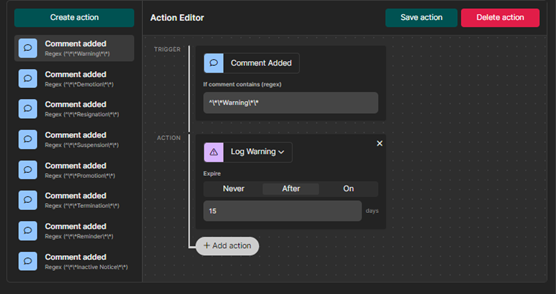
First confgure the action trigger. If a specific keyword has been sent, it will trigger the action. It uses regex to identify if the comment contains the specified word/sentence.
Configure the action
Once you have a trigger, time to configure the action. To create one, select Add action and it should show on the right or bottom of the trigger.Then, select what type of log will be created. For logging warnings, you have more choices to select!

Stackable Actions
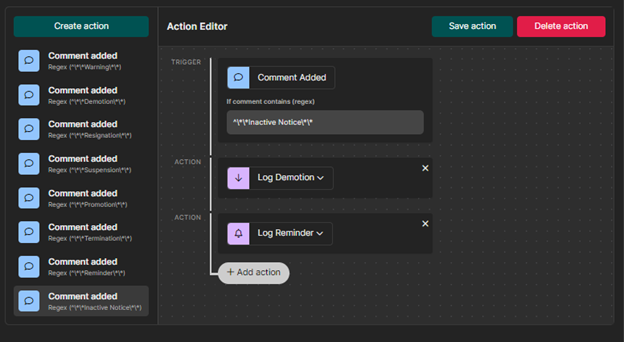
You can also stack actions too! You can mix and match on any of the actions based on your use-case!
Triggering the Action
Once everything has been set up, it’s time to test it out!To continue, you’ll need to be a member or admin of the Trello Board and have the permission View Logbook and Post to Logbook.
Post a comment to your Card
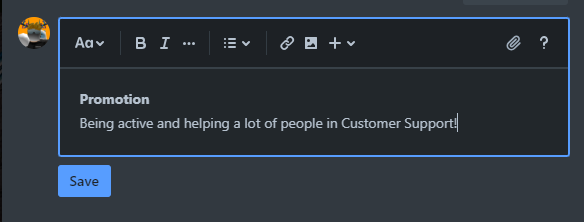
You can do this to any of your staff’s card. Just post a comment with the specific trigger.

Check your Logbook
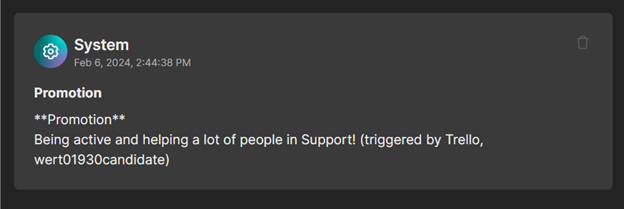
If the system detects the trigger word via Regex, it should create a logbook log.


(triggered by Trello, {Trello Username}) to signify that it was created via the Trello Integration.
Unlinking a Board
If you’ve accidentally chose the wrong board, don’t worry. Just select if it allows you to, and click Unlink board below the board’s photo and name.